Saturday, April 21, 2012

It's Morel Season!


April and early May in Western Pennsylvania is a special time of year for my family.  It's morel season and it's a challenge!  Most folks have never heard of morels and when "mushroom hunting" enters the conversation, it's met with concern and interest. "Don't pick any poisonous ones!  Magic mushrooms?  Are they safe?  How do you know what you are doing!  I'd be afraid to eat them!"
Are just a few common responses.  Once you see a morel, however, you realize they are easily recognizable.  They have a distinct honeycomb like cap, smooth stem, and are hollow.  They are odd yet beautiful and are a tasty delicacy!  Morels are often used in French and Italian cooking, but we use them in gravy, soup, stuffing, and even on pizza.   We also dry and store them for years using a food dehydrator.

The morels we find in Western PA range in size and color.  The largest are about the size and girth of a 12 oz soda can.  These are usually referred to as "yellows" and pop up later in the season.  Black and gray morels seem to be found at the beginning of the season and do not grow as large as the yellows.  Morels are not easy to find.  They require a keen eye, strong legs and PATIENCE.  There are, however, some clues to their whereabouts.  Morels are usually found around the base of dying or dead elm trees.  They usually grow in clusters, it is rare to find just one (but it happens, and its a bummer).  Sometimes you will find a huge cache of them (50 or more!), we like to call that a mother lode and it is exhilarating.  We have a few videos of some of our finds that can be found at the bottom of the post.

We have been lucky enough to find morels in odd places such as old apple orchards, slate piles, steep hillsides, and ravines.  A certain chemistry must occur in order for these mushrooms to grow.  Temperature, soil acidity, angle of sun, amount of rain, and ground cover have a lot to do with their germination.  Morels tend to reappear in the same spots year after year.  Once a shroomer maps out a territory, they don't share it's location.  If asked, they may give you a false location.  You can't blame them, finding them is hard work!
Moreling is a ton of fun, and an activity the whole family can appreciate.  There is no way to describe the feeling of finding a mother lode until you have found one yourself.  You need a good pair of hiking boots, a walking stick, and a knife......and most importantly patience!  Good luck!


*All Pictures in this post are from 4-5-2012.  2012 was an early season due to the high temperatures in March.  Hopefully we will continue to find morels until mid-May.  Time will tell...


Our 2011 Mother Lode Find


Morel Mushroom Update: Mega Morel found of 4-27-12

I had to post these pictures since this is one of the largest morels I have ever seen.  It was found by my father.  It was 9 inches tall and weighed a half pound!  It dwarfs this 12 oz beer can.  Made several delicious omelets!


Monday, March 26, 2012

Favorite Craft Store Coupons


I never shop without a coupon, below are some links to my favorite craft store coupons.  I will keep them up to date!

JoAnn Fabrics

Online Only:
15% off total order - Type in TEACHER2012
Expires: 8-31-12

10% off total order - Type in vipsave2012
Expires: 12-31-12


Sunday, March 25, 2012

Spring Cupcake Toppers


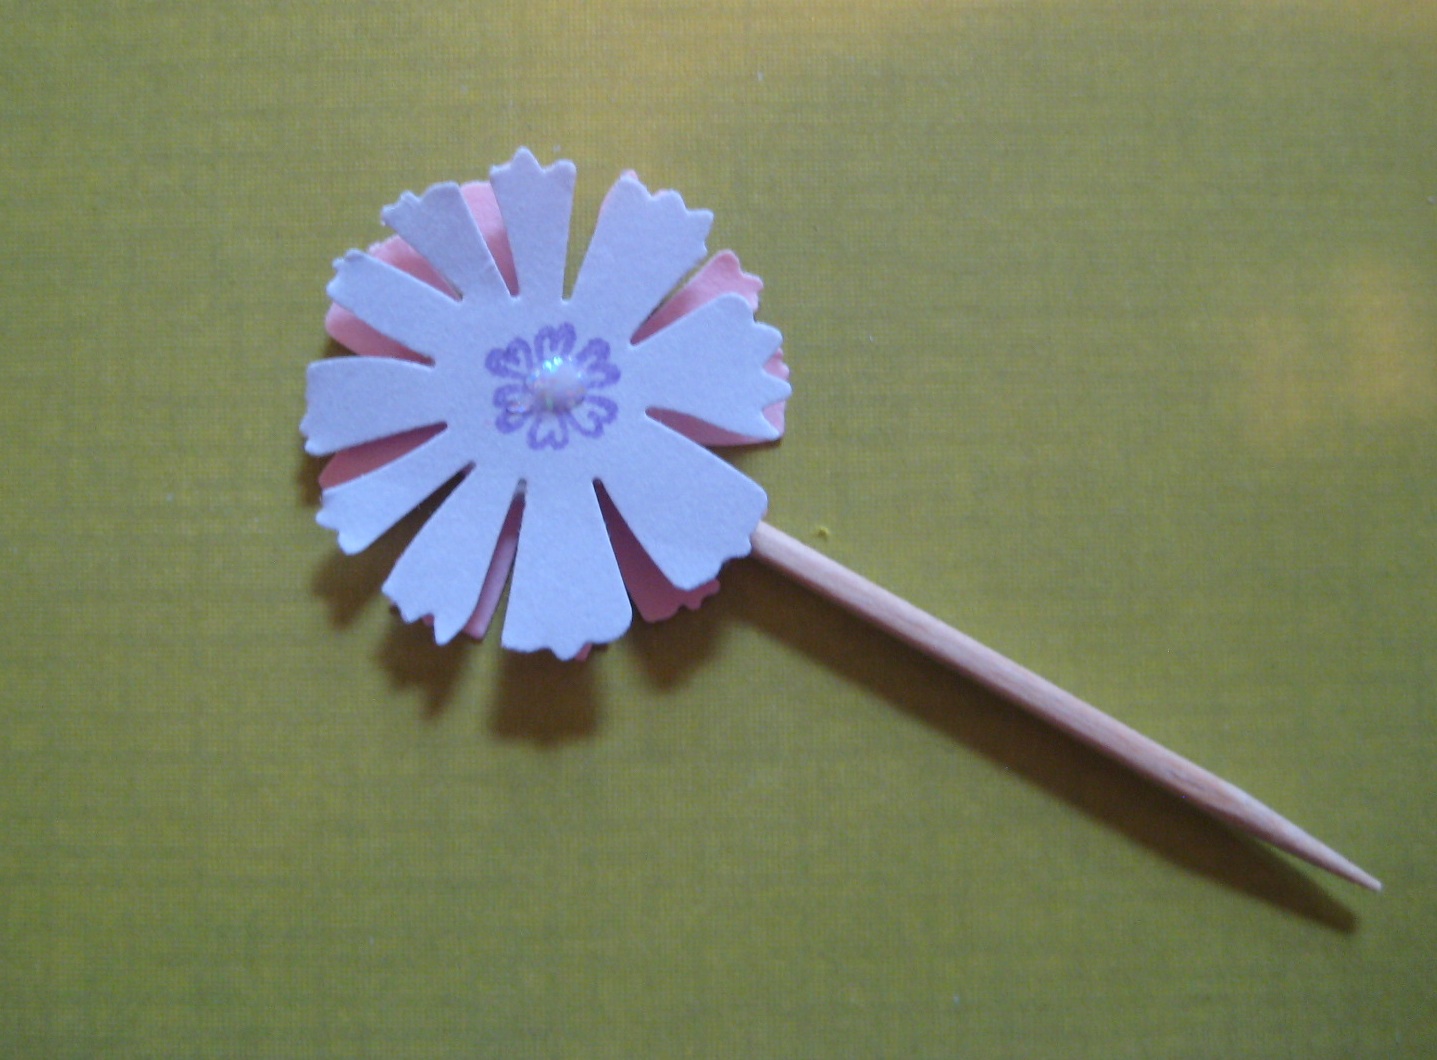
These flower cupcake toppers are cute and easy to make!  They are great for birthdays, holidays, wedding, and baby showers.  If you are already into paper crafting, you may already have all the supplies you need at home.


Supplies
  • Card stock
  • Paper punch 1-2" in diameter
  • Tooth picks
  • Craft glue (Aleene's tacky glue)
  • Embellishments (glitter, gems, buttons, etc)


I like to start by scavenging through my paper/card stock scraps. I usually have a lot of let over odd pieces from card making or scrap booking.  You can use plain card stock, printed, stamped, etc...  For the punch, I selected a 1 inch flower from Martha Stewart.  You will need to 2 punched flowers to make each topper.


I made as many flowers as I could from the paper scraps.  For this bunch of toppers, I planned to mix and match the colors.


Because I used plain card stock for this bunch, I used acrylic stamps and ink to make a center for each flower.  I used a small heart and swirl stamp.  I prefer clear acrylic stamps, but rubber stamps work just as well. 


To add some bling to the center of each flower, I used a dab of glitter glue and allow them to dry for an hour.  You can use anything for this step.  For the flowers featured above, I used gems and a small star punch.


To assemble the topper, you will need 2 flowers, a tooth pick, and glue.  Place one flower face down and add a pea sized dab of glue in the center of the flower.  Place the top of the tooth pick in the center of the gob of glue and push down. 


Add the top flower, sandwiching the glue and toothpick in the center.  Make sure the glue is touching both the top and bottom flower.  Allow to dry for an hour.  Do not pick them up until they have finished drying. 


Once dry, store in a zip lock bag for later use, or place them in iced cake or cupcakes. 


Wednesday, March 21, 2012

Create your own Spring Wreath for Under Ten Dollars

In need of a new spring wreath, but don't feel like paying $30-40 dollars at your local craft shop?  I made the wreath below for $9 dollars using tools I had at home and a trip to the local Dollar Tree.


I need a large wreath for our front door so I picked an 18 inch willow wreath for the base.  I selected and purchased 2 clusters of dark green leaves, and 6 clusters of flowers (purple, white, and green).  The wreath base and flower clusters were only $1 each.  Other tools needed for making the wreath were a low temperature glue gun and wire cutters.   


Start by separating the stem of each flower or leaf group from the main stems.  This can be difficult due to the wire inside, so be sure to use wire cutters (this could ruin your favorite pair of scissors).  Once you separate all the leaves and flowers into single stems, you can begin assembling the wreath. 


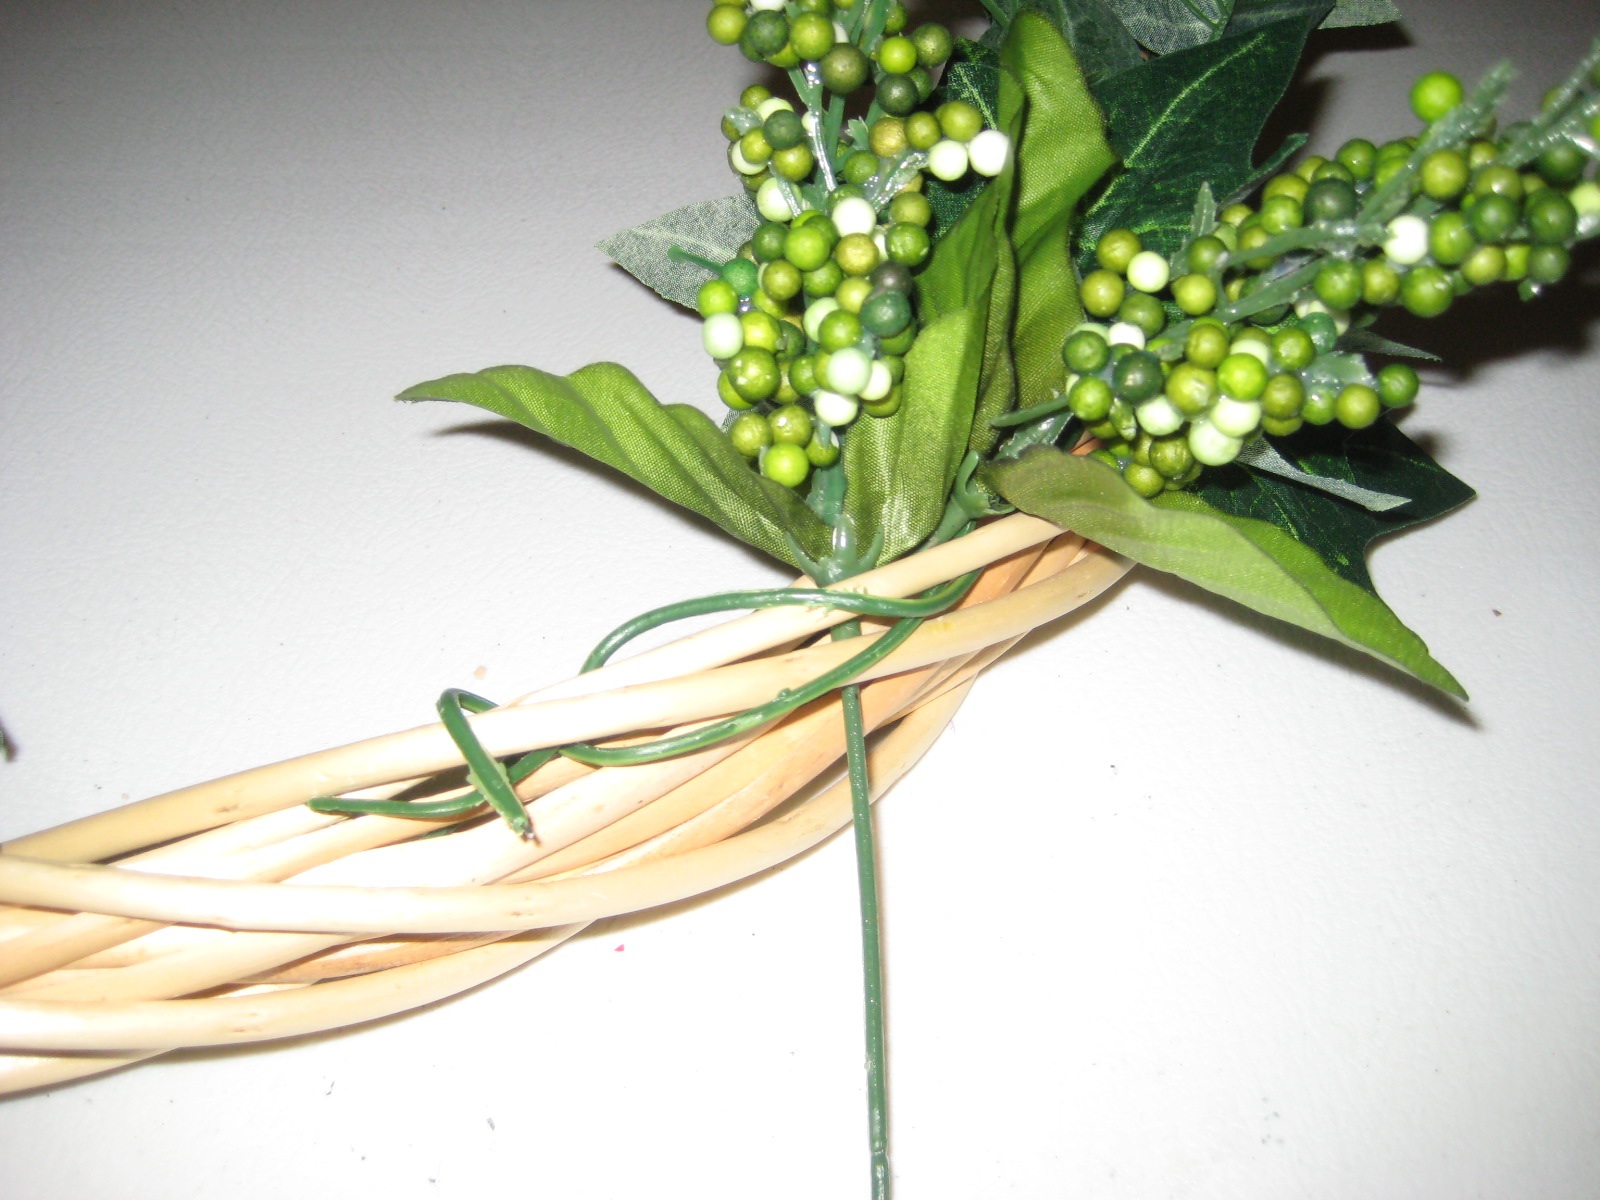
I started by weaving the long stem of each leaf group into the actual wreath base (no glue needed).  I randomly distributed the leaves and made a few areas with thicker foliage.   Once all the dark green leaves were added, I started weaving in the flowers (see close up below of how I bent the stems around the branches of the wreath).


I added the flower groups randomly around the wreath, trying to distribute the colors evenly.  In order to have a full wreath with little base showing, I used all the flowers and leaves.  The glue gun was only used o secure any flowers or leaves that were astray. 


This project took about 1.5 hours to finish.  It was fun and easy.  This project can be completed by both beginners and seasoned crafters!  There are many wreath sizes out there, so be sure to estimate the amount of flowers and leaves needed for the size you choose.  If you are a beginner, why not try a smaller wreath base, once you get the hang of it, you can go wild.  Good Luck!